Review of the Krytac Trident LMG
This is one beast of a gun, Krytac knows how to make a gun, and make it well. It's not perfect, but it's a heck of a lot better than what most other companies are putting out on the market these days. This review will primarily take a look at the gearbox of the Krytac AEGs, specifically, the Trident LMG's gearbox. The other M4s are all very similar, so you should expect to find similar internals in any Krytac M4 AEG.You'll need to forgive the seemingly half hearted attempt at a review. As I said, I did this to primarily see if these guns are worth all the hype they have, how the internals are. I'll come back later to fill the review out; addressing the externals and any other points I feel worthy of discussion.
Disassembly
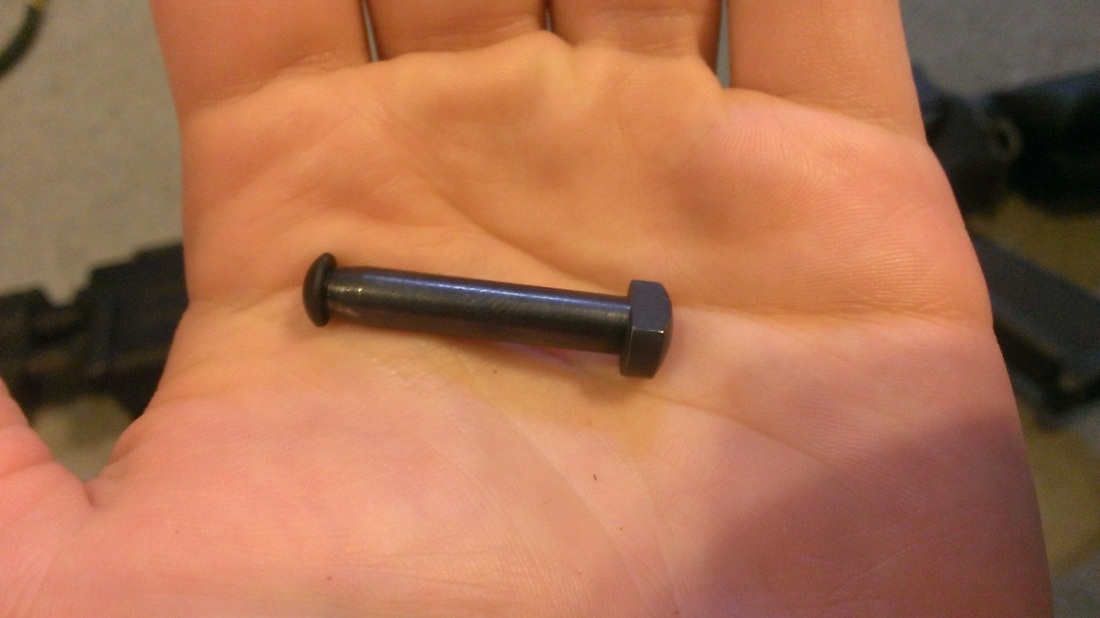
I guess to start with, the front pin, and the rear for that matter, are both beveled at the insert side of the pin. They are also both locked in with screws. These are 2.5mm hex heads. The front pin has a much more aggressive bevel than the back, I believe this is to allow easier disassembly/reassembly of the gun. In the manual, it suggests field stripping the gun to clean the hop up, and has detailed instructions on how to do so.
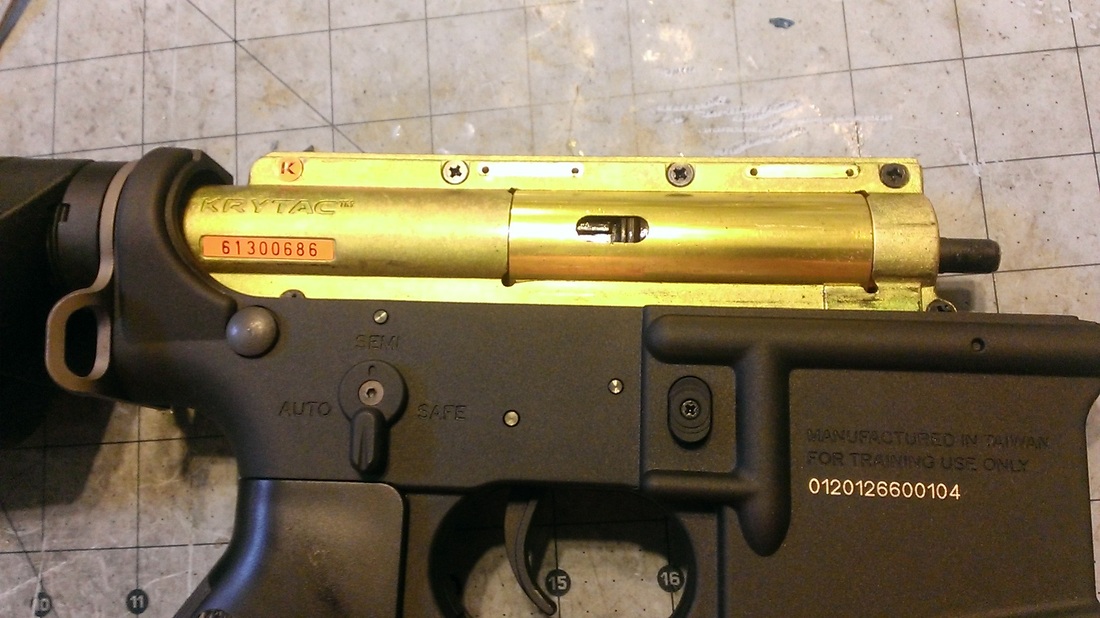
The gearbox is some mystery metal. I'm no expert, I couldn't say for sure, but I for sure know it's got a pretty solid gold tint to it. You can see that it almost matches the brass cylinder in color, just a bit brighter of a shin vs the brass's darker gleam.
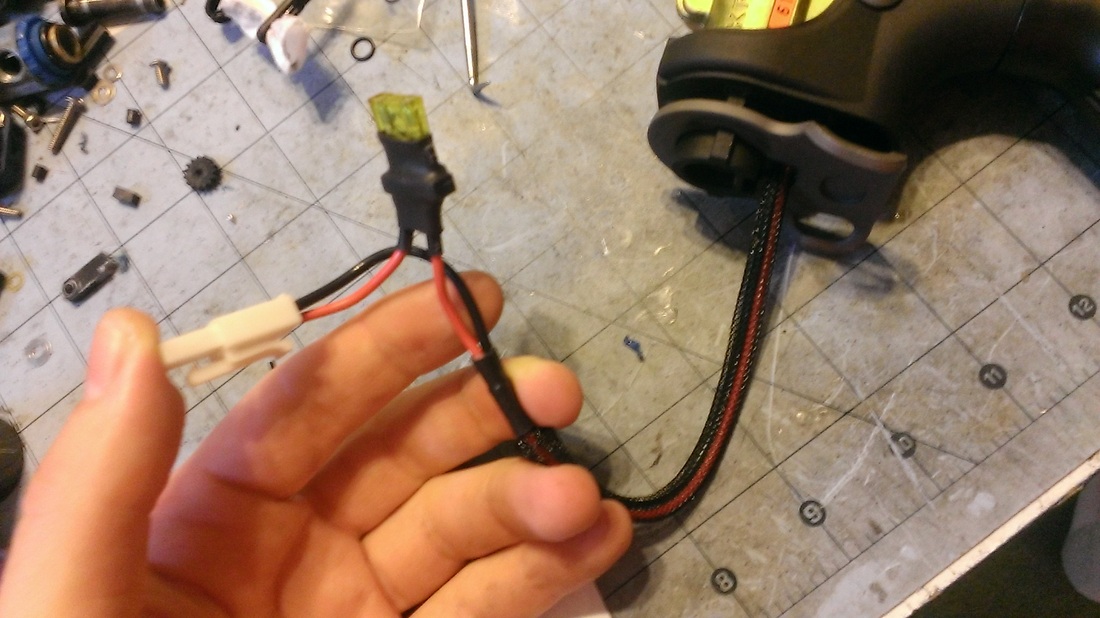
And already, the poor quality images are here. You can see the rear wiring system on the left, the 25 amp blade fuse, and the small type Tamiya connectors. Honestly, I'd like them to be deans, but it's understandable due to deans being rather rare on batteries, and it's better to just keep the Tamiya for marketing purposes. The wires are protected in a protective wire sleeve, they also appear to be 16g wire. It's got a pretty solid, but thin, coating around the wires themselves. The blade fuse is also a good improvement over the glass tube fuse. First off, it's 25 amps vs the normal 20 amps, second, blade fuses are much easier to find replacements for, and also have better connects/lower resistance than tube fuses do.
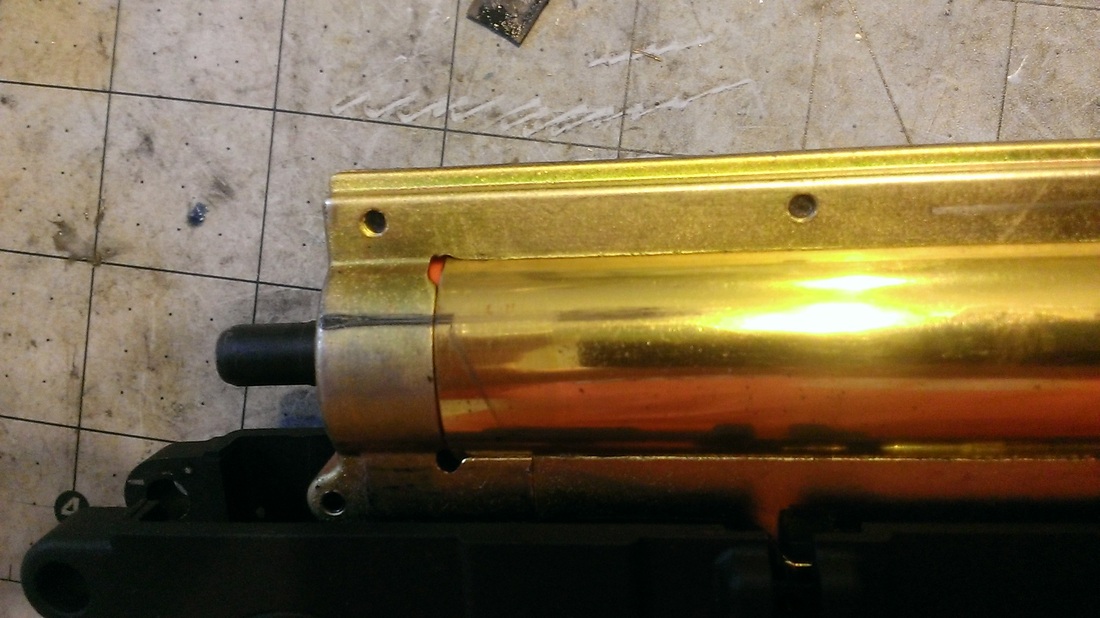
Above right, you can see that the stock gearbox is radiused. You can see the orange cylinder head peaking through the radiused corners of the shell. There's a little grease smudge from the bolt rubbing on the gearbox/cylinder. I rubbed my finger through the middle of it to see if it was a smudge or a mark. Confirmed it was a smudge, no rubbing marks that I can tell. It might rub down the road, but it shouldn't make any difference in the performance of the bolt or the shell.
Above right, you can see that the stock gearbox is radiused. You can see the orange cylinder head peaking through the radiused corners of the shell. There's a little grease smudge from the bolt rubbing on the gearbox/cylinder. I rubbed my finger through the middle of it to see if it was a smudge or a mark. Confirmed it was a smudge, no rubbing marks that I can tell. It might rub down the road, but it shouldn't make any difference in the performance of the bolt or the shell.
Ambidextrous Selector Switch
|
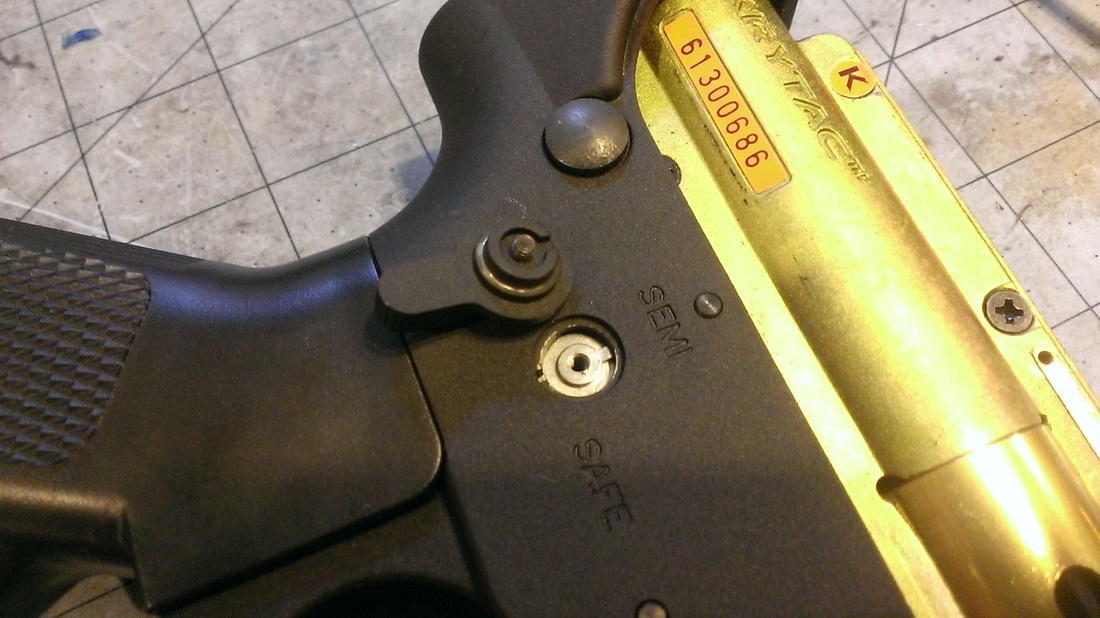
To the left, you can see the right side selector switch. The switch is screwed into the gun with a 2mm hex head screw. It locks in place with the gear under the gun. It locks in place well. Personally, I like it better than the VFC or G&G style of ambi switches, it seems to sit better.
There is no ball bearing/spring on the right side selector, only the left. The gears fit so well together, that you wouldn't really be able to tell that only one side of the mech has the locking ball bearing. |
Below you can see the right and left side of the gearbox. It's fairly standard as far as ambidextrous switches go. First notable difference is the gears attached to the selector switch itself is much larger than normal. There is still a cut out for the gear to fit into, so it sits in place. The gears are well made, as I discovered they were able to crush some of the bearings, but more on that later. The small gear goes through the gearbox, and links the two large gears. It's very solid, locks in place similarly to how the right side selector switch locks and screws onto the right side selector gear.
You can see in the right picture the left side of the gearbox (isn't that confusing). You see the tappet, the large gear, and a few ball bearings from the busted bearings. A few things to note about the selector switch and gear. First, you don't need to unscrew both selector switches to remove the gearbox! Yay! But, you do need to have the selector switch in the semi auto position to remove the box.
You can see in the right picture the left side of the gearbox (isn't that confusing). You see the tappet, the large gear, and a few ball bearings from the busted bearings. A few things to note about the selector switch and gear. First, you don't need to unscrew both selector switches to remove the gearbox! Yay! But, you do need to have the selector switch in the semi auto position to remove the box.
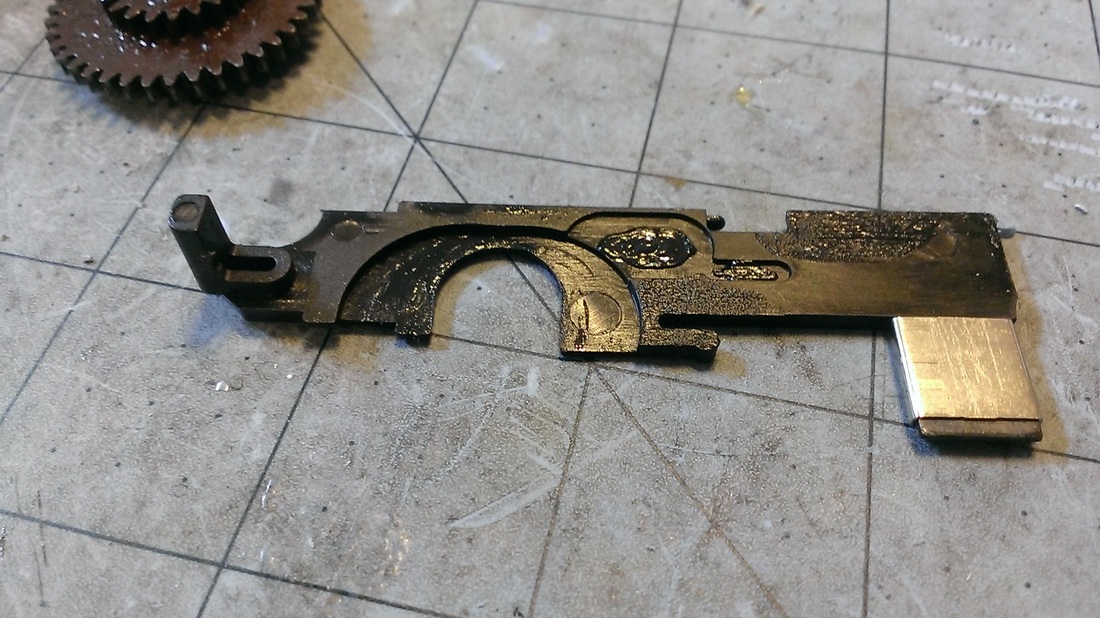
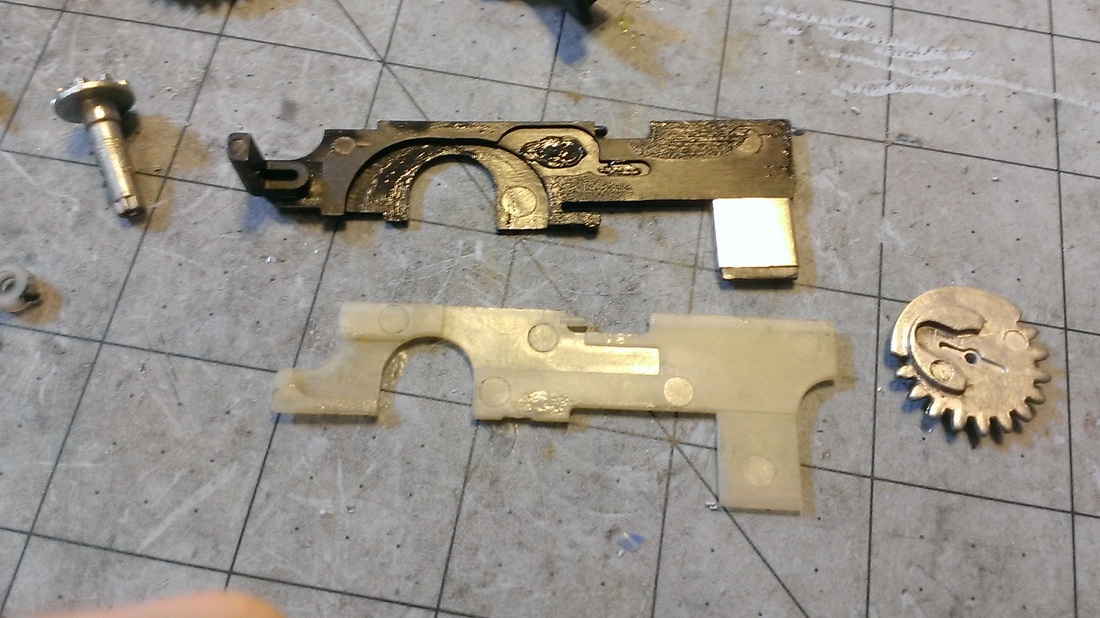
The selector plate is sort of proprietary, well, it is proprietary, but you could modify a regular V2 switch to fit. The stock plate has a large black part that goes into the gearbox. I'm not entirely sure on it's function, as it doesn't interact with anything internally. However, for a long time, there were rumors that the gun would release the ARL when switched to safety, I believe this to be part of the mech for that to happen. Now, in the Trident, no such parts exist, and from what I've seen and handled with the CQRs, it doesn't have this ARL release function either. That just leaves us with this plastic bit that fits inside of the gearbox.
There's also the gear cut out part of the plate, this is what you would need to cut for a standard V2 to fit, it needs to have those cut outs to fit around the selector switch gears. A little good news is that the stock switch seems pretty robust, I wouldn't expect it to break or fail.
Lastly, there's a small, extra bit of plastic on the bottom of the selector switch, this locks into place for each selector plate location, helping to make that gearing system just ever so slightly more solid. You can see it in the picture above right, there is a pa
